

Archive

October 5, 2023

Browsing

Polished concrete floors have become increasingly popular in both residential and commercial spaces due to their durability, low maintenance requirements, and sleek appearance. However, to keep your polished concrete floors looking pristine and long-lasting, it’s essential to follow a proper maintenance routine. In this article, we will discuss five valuable tips for maintaining polished concrete floors.

  1. Regular Cleaning is Key

The first and most crucial tip for maintaining polished concrete floors is regular cleaning. Dust, dirt, and debris can accumulate on the surface over time, diminishing the floor’s shine and causing minor scratches. To prevent this, sweep or dust mop your polished concrete floors daily. This simple step helps to remove loose particles that can act as abrasives.

For deeper cleaning, use a neutral pH cleaner specifically designed for polished concrete. Avoid harsh chemicals like ammonia or vinegar, as they can damage the surface. Instead, opt for a cleaner that is gentle on the polished finish while effectively removing stains and grime. Regular cleaning not only enhances the floor’s appearance but also prolongs its lifespan.

  1. Protect Against Stains

Polished concrete floors are susceptible to staining, especially from acidic or oil-based substances. To prevent stains, promptly clean up spills as they occur. Use a clean cloth or mop to blot and absorb the liquid rather than wiping it, as wiping can spread the stain. For tough stains, consult your flooring professional for appropriate stain-removing solutions.

Additionally, consider applying a quality concrete sealer to your polished floor. Sealers act as a protective barrier against stains and can make it easier to clean up spills before they penetrate the surface. Be sure to reapply the sealer as needed, typically every one to three years, depending on the level of foot traffic in your space.

  1. Use Furniture Pads

Furniture legs and other heavy objects can scratch or damage your polished concrete floors if not adequately protected. To prevent this, use furniture pads or felt protectors under the legs of chairs, tables, and other furnishings. These pads create a buffer between the floor and the furniture, reducing the risk of scratches and dents.

Regularly check and replace these pads when they show signs of wear. Additionally, when moving heavy objects, lift them rather than dragging them across the floor to avoid surface damage.

  1. Maintain a Consistent Maintenance Schedule

Consistency is key to preserving the beauty and integrity of your polished concrete floors. Create a maintenance schedule that includes regular cleaning, resealing as needed, and addressing any repairs promptly. Keeping a record of your maintenance activities can help you stay on track and ensure your floors receive the care they deserve.

  1. Address Cracks and Damage

Over time, your polished concrete floors may develop cracks or minor damage. It’s crucial to address these issues promptly to prevent them from worsening. Contact a professional concrete flooring contractor to assess and repair any cracks or damage. Prompt repairs can prevent moisture from seeping into the subfloor, which can lead to more extensive problems.

In conclusion, maintaining polished concrete floors requires a combination of regular cleaning, stain prevention, protective measures, consistent maintenance, and addressing any issues promptly.

By following these five tips, you can ensure that your polished concrete floors continue to shine and provide an attractive, durable surface for many years to come. Proper care and attention will not only enhance the aesthetics of your space but also protect your investment in floor polishing.
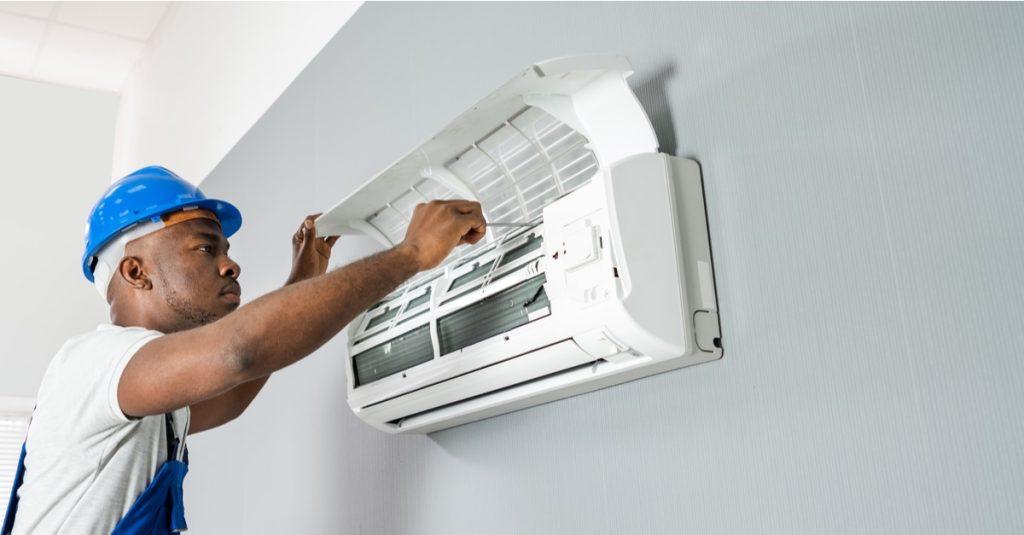

Your air conditioning is a vital component in keeping your home comfortable, especially during the scorching summer months. To ensure it runs efficiently and reliably, it’s crucial to be aware of signs indicating that it may be in need of professional air conditioning maintenance. Here are some key indicators to watch out for:

1. Reduced Cooling Performance

If you notice that your air conditioning isn’t providing the level of coolness it used to, it’s a clear sign that something might be amiss. Reduced cooling power could be due to issues with the compressor, refrigerant levels, or airflow.

2. Unusual Sounds

Pay attention to any unusual sounds emanating from your AC unit. Clanking, banging, or hissing noises could be indicative of loose or damaged components, which require prompt attention from a professional.

3. Foul Odors

Strange or unpleasant odors coming from your air conditioning could signal a variety of problems. Musty odors may indicate mold growth, while burning smells could suggest electrical issues. These situations require immediate professional assessment.

4. Frequent Cycling

If your air conditioning cycles on and off too frequently, it’s struggling to maintain a consistent temperature. This not only puts unnecessary strain on the system but also leads to higher energy bills.

5. Uneven Cooling

Noticeable temperature disparities in different areas of your home are a clear indication that your AC system is not distributing cool air evenly. This could be attributed to blocked ducts or a malfunctioning thermostat.

6. High Humidity Levels

Your air conditioning plays a crucial role in regulating humidity levels indoors. If you find that your home feels excessively humid, it could be a sign that your AC system requires maintenance.

7. Leaks or Moisture Accumulation

Any signs of moisture or leaks around your air conditioning warrant immediate attention. This could be a result of a blocked drain line or a refrigerant leak, both of which necessitate professional intervention.

8. Visible Wear and Tear

Take a look at the external components of your air conditioning. Cracked or damaged parts, loose connections, or excessive dirt and debris can all contribute to reduced efficiency.

9. Skyrocketing Energy Bills

A sudden spike in your energy bills without a corresponding increase in usage is a clear indication that your air conditioning is working harder than it should. Regular maintenance can help ensure optimal energy efficiency.

10. Inconsistent Airflow

Weak or insufficient airflow from your vents could be due to clogged filters, a malfunctioning blower fan, or ductwork issues. These problems can impede your AC’s performance and should be addressed promptly.

Conclusion

In conclusion, being vigilant about these signs and promptly seeking professional maintenance can prevent minor issues from escalating into costly repairs. Regular upkeep not only prolongs the lifespan of your air conditioning but also guarantees its efficient operation, keeping your home consistently cool and comfortable. Don’t hesitate—schedule a professional maintenance check today!

Introduction

Pantry moths, those uninvited guests in your kitchen, can be a real nuisance. They infiltrate your food storage and can quickly become a persistent problem if not dealt with promptly. In this comprehensive article, we will delve into the 4 things you need to know about pantry moths and their moth control. From understanding their habits to effective eradication methods, we’ve got you covered.

  1. The Sneaky Invaders

Pantry moths, also known as Indian meal moths, are tiny insects that infest stored food products. They often enter your home through contaminated food items from the store. These moths lay eggs in your pantry, and before you know it, you have an infestation on your hands.

These pests are usually about half an inch long with distinctive wings. Identifying them correctly is the first step in dealing with them effectively.

  1. Signs of an Infestation

Spotting pantry moth larvae or adult moths flying around your kitchen is an obvious sign of an infestation. However, there are other telltale signs to look out for:

  • Webbing: Pantry moths create silky webbing in food packages, which is a clear sign of their presence.
  • Small Holes: Tiny holes in packaging are often caused by larvae feeding on the contents.
  • Cocoons: Look for small, silky cocoons in corners or on the walls of your pantry.
  1. Prevention Is Key

The best way to deal with pantry moths is to prevent them from entering your home in the first place. Here are some prevention tips:

  • Inspect Purchases: Check all food items before bringing them into your kitchen.
  • Use Airtight Containers: Store grains, flour, and cereals in airtight containers to prevent infestations.
  • Regular Cleaning: Keep your pantry clean and dry, as moths are attracted to crumbs and spills.
  • Rotate Stock: Use older items first to avoid letting food sit for too long.
  1. Effective Eradication

If you’re already determined for moth removal , don’t worry; there are effective ways to eliminate them:

  • Dispose of Infested Items: Throw away any food products that show signs of infestation.
  • Freezing: Freeze susceptible items for at least a week to kill any larvae or eggs.
  • Pheromone Traps: Use pantry moth traps to catch adult moths and disrupt their breeding.
  • Deep Cleaning: Thoroughly clean your pantry, including shelves and corners, to remove any remaining eggs or larvae.

Professional Moth Control

For severe infestations or persistent problems, it’s advisable to hire professional pest control services. Professionals can accurately identify the moth species and provide targeted treatments to eliminate them.They also offer preventive measures to reduce the risk of future infestations.

Frequently Asked Questions

Q1: Can pantry moths harm my health?    

While pantry moths are not directly harmful to humans, consuming infested food can lead to gastrointestinal discomfort.

Q2: How long does it take to get rid of pantry moths?     

It may take a few weeks to completely eliminate pantry moths, depending on the severity of the infestation.

Q3: Are pantry moths attracted to specific types of food?

Yes, pantry moths are particularly attracted to grains, cereals, and flour.

Q4: Can I use natural remedies to get rid of pantry moths?   

Yes, you can try using natural repellents like bay leaves and cloves to deter pantry moths.

Q5: Do pantry moths have any natural predators?    

Some birds, such as swallows and house sparrows, feed on adult moths and can help control their population.

Q6: How can I prevent pantry moths in my outdoor pantry or storage shed? 

Ensure that these spaces are well-sealed and regularly cleaned to minimize the risk of infestation.

Conclusion

Dealing with pantry moths can be frustrating, but armed with knowledge and a few simple strategies, you can keep your kitchen moth-free. Remember to stay vigilant, practice good food storage habits, and act promptly if you suspect an infestation. With these 4 things you need to know about pantry moths, you’ll be well-prepared to protect your pantry and your peace of mind.