
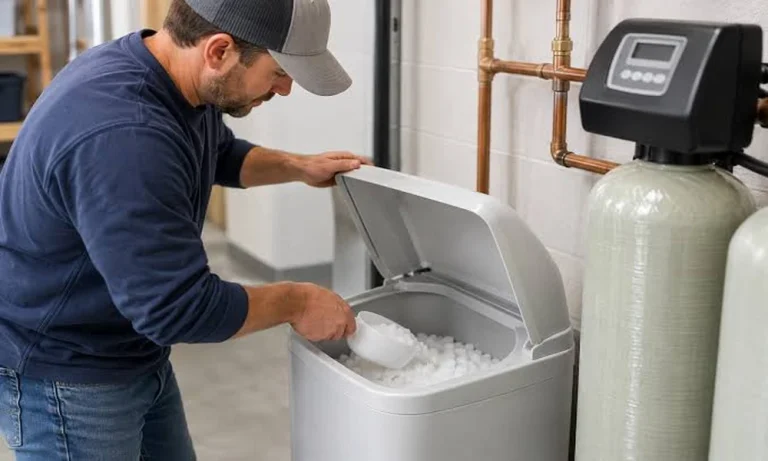
Water softener maintenance helps a system remove hardness minerals consistently, protect its resin and control components, and avoid preventable interruptions. For most salt-based systems, routine care means checking the salt supply, keeping the brine tank in good condition, reviewing settings, and watching for changes in water quality. The right schedule depends on water hardness, household use, equipment type, and the manufacturer’s instructions.
A conventional salt-based softener uses ion-exchange resin to reduce calcium and magnesium. A brine solution periodically regenerates that resin. Other conditioners use different technologies and may not have a salt tank, so first identify the model and follow its own manual.
At a glance
| Area | Key point |
| Routine | Use a consistent, manufacturer-guided schedule |
| Safety | Do not improvise work on hazardous components |
| Observation | Record changes before symptoms worsen |
| Professional help | Escalate persistent or risky faults |
Know the system before servicing it
Find the model number, manual, bypass valve, control head, and any prefilter. Similar-looking units may use different settings and procedures. Record the original settings before making approved changes, and never turn valves or disconnect parts based on guesswork.
Confirm whether the equipment is salt-based or a salt-free conditioner. A salt-free unit does not have the same brine-tank routine. If paperwork is missing, use the model label to find the correct instructions instead of relying on a generic video.
Check salt levels and salt type
Inspect the salt supply at the interval recommended by the maker and refill before it falls below the required level. Avoid overfilling without checking the tank’s design. Salt use changes with incoming hardness, water consumption, and regeneration settings, so a sudden change can be a useful clue.
Use only the salt type approved for the model, such as the specified pellets or crystals. Keep bags dry and do not mix in scented or treated products unless the manufacturer permits them. Salt prepares brine for regeneration; it is not poured directly into household drinking water.
Find and address salt bridges
A salt bridge is a hardened crust above an empty space in the brine tank. The tank can look full while salt is not reaching the water, preventing the unit from preparing brine correctly. Symptoms may include persistent hardness or a salt level that barely changes.
Do not attack a bridge with a sharp metal tool or strike the tank hard. Follow the maker’s method for loosening it without puncturing the liner or damaging internal parts. If the mass is thick or returns repeatedly, request service and review salt type and storage conditions.
Clean the brine tank only when needed
Some systems need occasional tank cleaning; others are designed to require little routine intervention. Look for sludge or unusual deposits, then check whether the manufacturer recommends cleaning. Unnecessary disassembly can damage floats, tubing, or seals and may create a leak that was not there before.
When cleaning is required, follow the documented procedure for emptying, rinsing, and reassembling the tank. Do not add bleach, disinfectants, or other chemicals unless explicitly directed by the equipment maker. If odours or debris return quickly, investigate the source rather than repeating the same cleaning cycle.
Review regeneration settings
Regeneration restores the resin’s capacity to remove hardness. Controls may use a timer, a water meter, or demand-based logic. Incorrect hardness or capacity settings can waste salt and water, or let hard water pass through before the next cycle. Household demand and source-water hardness both matter.
If household size or the water supply changes, check the manual or ask a qualified water-treatment professional to verify settings. Do not simply reduce the salt dose to cut operating costs; that may impair treatment. Record the original configuration so an approved adjustment can be reversed if performance worsens.
Check water quality rather than guessing
Scale on taps, spots on dishes, and changes in soap lather can suggest that hard water is getting through. They do not prove the softener has failed. A bypass valve, empty salt supply, bridge, programming issue, or a change in source water can create similar symptoms.
Use an appropriate hardness test or arrange testing when performance changes. A softener addresses hardness minerals, not every possible contaminant. If water develops a new smell, colour, or taste, investigate the source and consider suitable water testing rather than assuming that a softener can make it safe.
Inspect visible fittings and drainage
Look for moisture around the inlet, outlet, bypass valve, brine tubing, and drain line. Confirm the drain is secured and installed according to the manual, including any required air gap or backflow protection. Keep the surrounding floor dry so small leaks are easier to notice.
Do not overtighten plastic fittings, which can crack under excessive force. Operate the bypass only as instructed; leaving it in the wrong position can send untreated water to the home. If a leak persists or a valve appears damaged, arrange qualified plumbing or water-treatment service.
Protect filters and internal components
If the system has a sediment prefilter, maintain it on its own schedule and use the correct replacement cartridge. A clogged filter can reduce flow. After replacing it, check the housing and seal for leaks without forcing the parts together.
The resin bed and control valve generally are not routine homeowner cleaning tasks. Use resin cleaners only if the manufacturer approves them, and do not dismantle a valve to clear a suspected blockage. If the system repeatedly fails to regenerate, professional diagnosis is safer than trial-and-error disassembly.
Recognise warning signs
Pay attention to persistent hardness, unusual salt consumption, frequent regeneration, brine overflow, repeated error codes, or water around the control head. Note when the issue began and whether there was a power outage, plumbing work, or change in source water.
Simple causes may be easy to correct, but recurring faults can involve injectors, seals, controls, resin condition, or incorrect sizing. Avoid forcing repeated regeneration cycles as a test. Record the error message and follow only the troubleshooting steps the manual identifies as safe.
Plan for outages and long absences
After a power interruption, check the display and clock if the model uses electronic controls. Some systems retain settings; others may need the time reset. Verify the programmed settings before changing anything else, and use only a manufacturer-approved power arrangement.
For a long absence, follow the manual’s instructions for water supply, bypass position, and regeneration. Do not assume every model should be unplugged. In freezing conditions, protect the plumbing and unit according to local conditions, then check for leaks and normal operation when returning.
Know when to book service
Professional service is appropriate for repeated regeneration failure, brine overflow, leaks from the control head, or poor performance despite correct salt and settings. A technician can check valve seals, injectors, flow controls, resin condition, and programming with the proper tools.
Before booking, collect the model number, approximate installation date, symptoms, and any hardness test results. Ask what the diagnostic fee covers and whether replacement parts have a warranty. A performance test after the repair can confirm whether the system is treating water as intended.
Keep a maintenance log
A useful routine is to inspect salt and visible fittings monthly, while using the manual’s intervals for tank cleaning and filter changes. More frequent checks may be sensible with very hard water or heavy household demand. The aim is consistent observation, not constant adjustment.
Record salt additions, regeneration behaviour, filter replacements, service visits, and test results. These notes reveal trends and help a technician understand the history. If settings are changed or a part is replaced, write down the date and work performed so future troubleshooting does not start from zero.
Practical checklist
- Check salt level and visible leaks.
- Use the approved salt type and settings.
- Test hardness if water quality changes.
- Keep a log of refills, errors, and service.
- Leave internal valve repairs to qualified service.
Troubleshooting without guesswork
When performance changes, write down the symptoms, timing, and any recent changes to the water supply or settings. Confirm the easy items first: correct bypass position, adequate salt, no visible leak, and a display without a new error. Do not dismantle valves or add cleaning chemicals based on an unverified online suggestion. A simple record helps separate a one-time setting issue from a fault that needs service.
If symptoms continue, arrange a hardness test and ask the service provider to explain the diagnosis before replacing parts. The right repair depends on measured water conditions, equipment age, and component condition. Keep the old settings and any service notes so future visits can build on the evidence instead of repeating the same checks.
Salt, water, and equipment records
Salt consumption is useful information when interpreted over time. A household that suddenly needs much more salt may have changed its water use, but the cause could also be a programming change, a leak, or a control fault. Record the approximate refill date and amount rather than trying to estimate from memory. If consumption changes sharply without a clear reason, compare the display settings with the manual and arrange a service check if needed.
Water pressure and flow can also reveal changes, although they are affected by plumbing and filters elsewhere in the home. If several taps have reduced flow, do not assume the softener is responsible. Check for other recent plumbing changes and ask a plumber to assess the full path. This avoids replacing softener components when the cause is a clogged filter or a separate restriction.
Keep the equipment area accessible and dry. Avoid storing corrosive products, heavy bags, or items that could damage tubing against the unit. A clear area makes it easier to spot leaks and gives a technician safe access during service.
After maintenance, verify normal operation
After any permitted maintenance, check the display for warnings and confirm that the unit returns to its normal operating mode. Do not assume a reset has solved the underlying issue simply because the warning temporarily disappears. If the same code returns, note the timing and contact the service provider. Keep the bypass position and settings consistent with the manual so a simple check does not accidentally leave the home receiving untreated water.